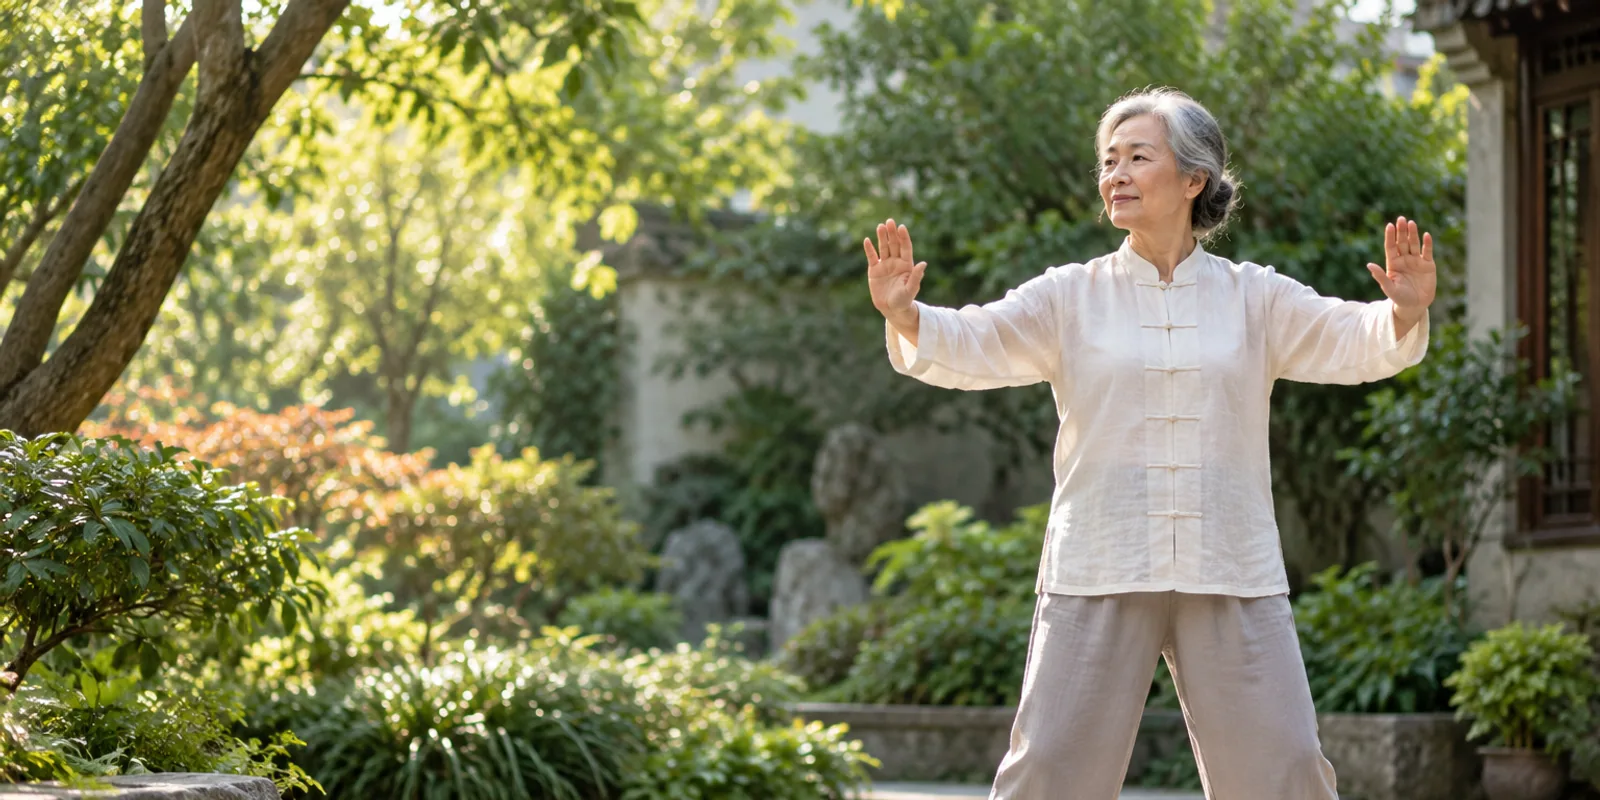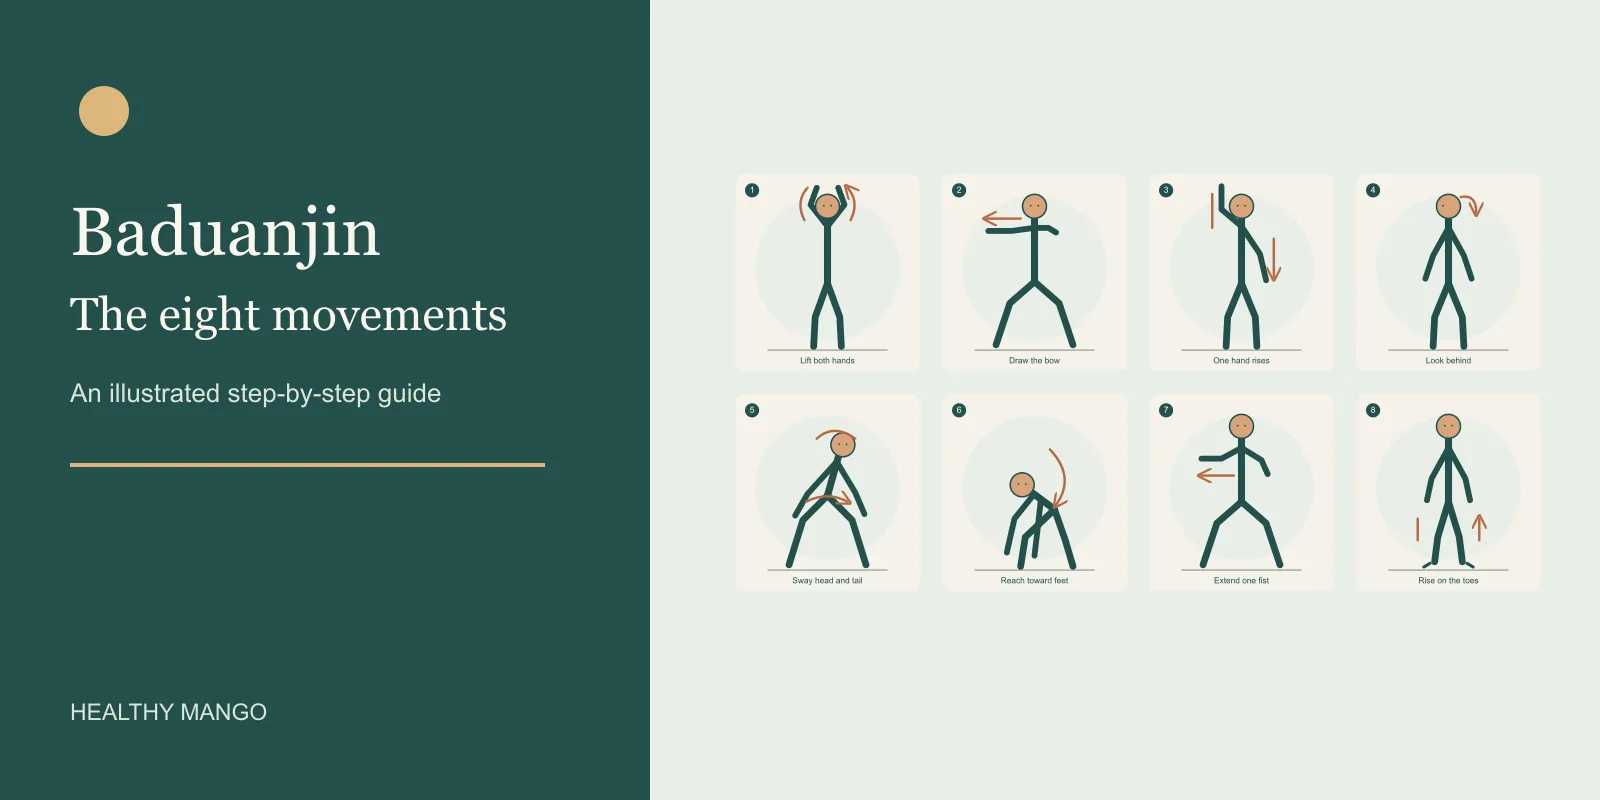
Baduanjin is a set of eight standing movements that you can learn one at a time. Start with a comfortable stance, move slowly, and breathe normally. The numbered pictures below show a key position in each movement. They are simplified drawings, so use the written directions to move into and out of each position. You do not need to squat deeply, touch your toes, hold your breath, or force a painful joint to complete the sequence.
This guide follows the order shown by China's General Administration of Sport (https://www.sport.gov.cn/n20001280/n20001265/n20067611/c20106840/content.html). A detailed 2026 Baduanjin practice document from Chinese sports and traditional-medicine organizations (https://www.sport.gov.cn/qgzx/n5402/c29596700/part/29596710.pdf) informed the movement descriptions. That document was a consultation draft when checked, so it is a teaching reference, not a final medical standard. The English labels below describe what the body does. Traditional names refer to old ideas about organs and energy; they do not establish that an individual movement treats an organ disease.
Before you begin
Choose a clear floor with room to extend both arms. Wear shoes that grip or practice barefoot on a stable surface. Stand with feet about hip to shoulder width apart, toes roughly forward, knees soft, shoulders loose, and eyes ahead. Let your hands rest near the lower abdomen. Check that you can breathe and talk comfortably. If standing is unsteady, keep a sturdy chair or counter nearby. Learn the sequence with a qualified instructor if balance, joint pain, recent surgery, or a neurological condition makes the pictures difficult to follow.
For a first session, try one slow repetition of each movement on each side where relevant. Pause whenever you need to. Later, a familiar routine may use several repetitions, but there is no reason to match an instructor's depth or speed immediately. The Chinese practice draft advises natural breathing for beginners. Do not hold your breath during effort. A light inhale as you open or rise and an exhale as you release can feel comfortable, but let breathing stay easy.
1. Lift both hands toward the sky
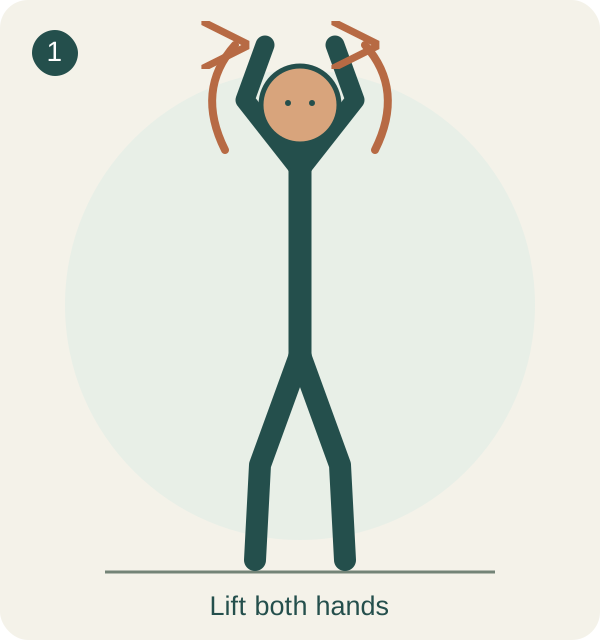
Begin with your palms facing upward in front of the lower belly. Bring the hands toward the chest and turn the palms outward and upward. Raise both hands in front of you until they are comfortably overhead, as though supporting a light shelf. Let the elbows straighten only as far as they can without locking. Keep the chin level and the ribs relaxed; avoid leaning backward to reach higher. Lower the arms out to the sides and return your hands to the starting position. Follow the hands with your eyes only if that does not strain the neck.
The useful feeling is a gentle lengthening through the sides of the trunk and shoulders. If overhead reaching hurts, stop at forehead or shoulder height. A smaller reach still lets you practice the rhythm. The diagram shows the high point, while the whole movement includes a slow rise and return.
2. Draw the bow left and right
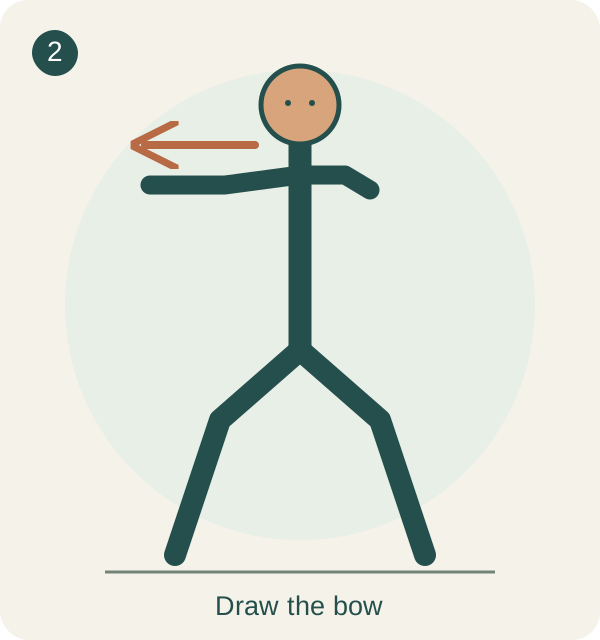
Step the feet a little wider. Bend the knees into a shallow, comfortable stance and keep them pointing in the same direction as the toes. Bring both hands near the chest. Extend the left arm sideways at about shoulder height, palm facing outward, as if you were holding a bow. Pull the right elbow toward the right shoulder, as if drawing a string. Look toward the left hand without twisting the knees. Bring both hands back toward the chest, then repeat to the right. One left and one right make a pair.
Keep the shoulders low and the wrists comfortable. Let the torso turn only a little; the work should not come from wrenching the lower back. You may stand almost upright instead of taking a deep horse stance. If one shoulder is limited, extend only to a pain-free point and make the pulling arm smaller.
3. Lift one hand and press the other down
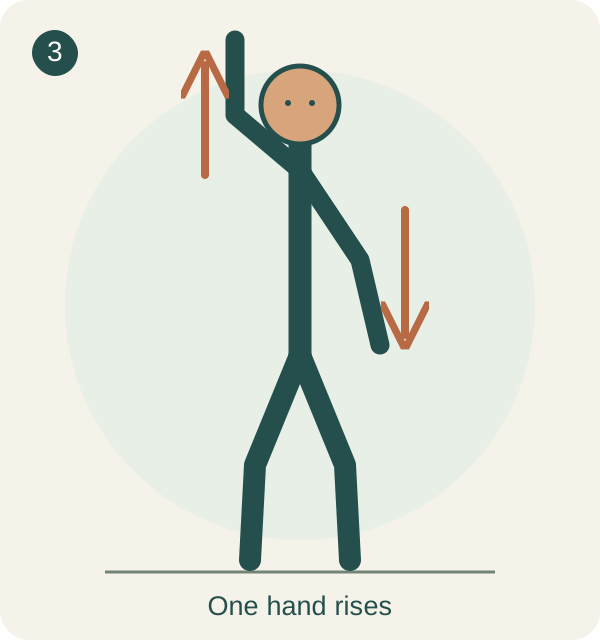
Return to a hip-width or shoulder-width stance. Bring both hands in front of the middle of the body. Turn the left palm upward and raise it above the head while the right palm faces down and travels toward the right hip. Think of the two hands moving gently apart. Stay tall through the trunk without tipping toward the low hand. Lower the left hand, bring the hands back together, and reverse the action: right palm rises, left palm presses down.
Move smoothly through the middle rather than throwing one arm up. The high hand can stop at eye level if shoulder movement is restricted. Keep both elbows soft and avoid lifting the shoulder toward the ear. The picture shows the separated hands on one side; switch sides to complete the movement.
4. Look behind each shoulder
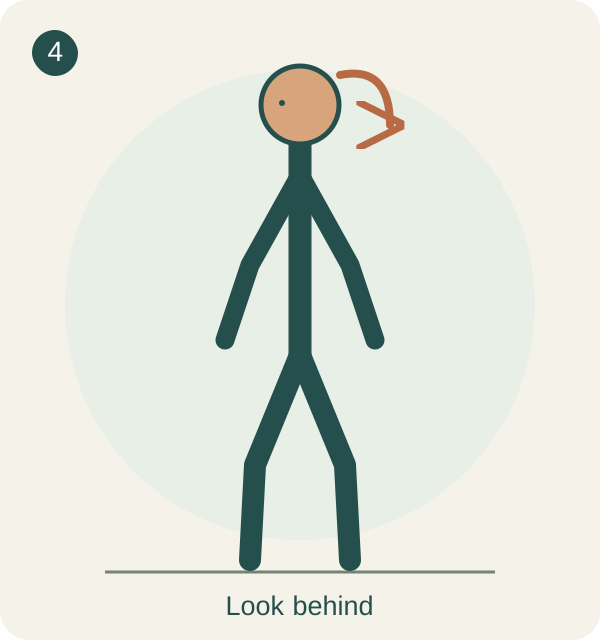
Stand tall with arms relaxed by your sides and palms near the thighs. Slowly turn your head to look over the left shoulder. Let the gaze lead and stop before you feel a neck pinch. Keep the shoulders mostly forward and both feet planted. Return your eyes and head to center, pause, then turn to look over the right shoulder. Some traditional versions also rotate the palms outward and open the chest lightly as the head turns. That arm action is optional when learning.
This is a controlled glance, not a test of how far the neck can twist. Keep the chin approximately level and avoid tipping the head back. If turning causes dizziness, a headache, or neck pain, stop. A small eye and head turn may be enough. The diagram emphasizes the change in gaze, not a whole-body spin.
5. Sway the head and tail
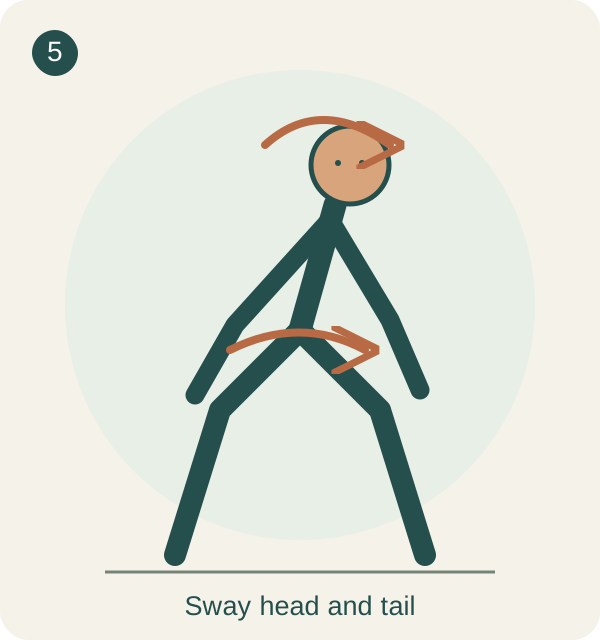
Step into a comfortable wide stance and place the palms on the thighs just above the knees. Bend the knees only slightly. Keep the back long as you shift your chest toward the right thigh. Trace a shallow arc forward through the middle toward the left thigh, allowing the pelvis to sway in the opposite direction. Lift the chest back to center and repeat the arc from left to right. Let the head travel with the trunk; do not whip it separately. Take enough time that each direction feels controlled.
This movement is often shown with a deep squat and a large torso circle. You can make a much smaller arc, particularly if you have knee, back, or balance concerns. Keep weight through the feet, avoid forcing the knees inward, and do not hold a bent position if it causes breathlessness or pain. A teacher can help you learn the coordination of head, trunk, and pelvis. The picture captures one side of the arc.
6. Reach toward the feet
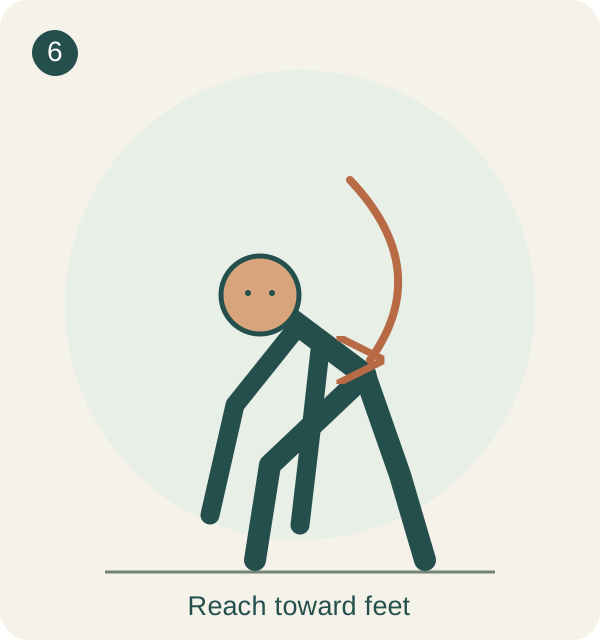
Bring the feet back toward shoulder width. Lift the arms gently in front, then lower the hands toward the torso. Hinge at the hips so the upper body tips forward as one long unit. Let the hands travel down the front or back of the legs toward the thighs, shins, or feet, depending on your range. Bend the knees a little and keep the neck in line with the back. Pause briefly, then press through the feet and rise slowly, bringing the arms forward and up only as high as comfortable.
The name mentions touching the feet, but that is not a requirement. Reaching to the upper thighs is a sensible version. Do not bounce, round the back aggressively, or hang the head if that makes you dizzy. People with osteoporosis, a recent spinal injury, or another reason to avoid forward bending should ask a clinician or physical therapist for an appropriate modification. The diagram shows a forward reach, not a target depth.
7. Extend one fist with a steady gaze
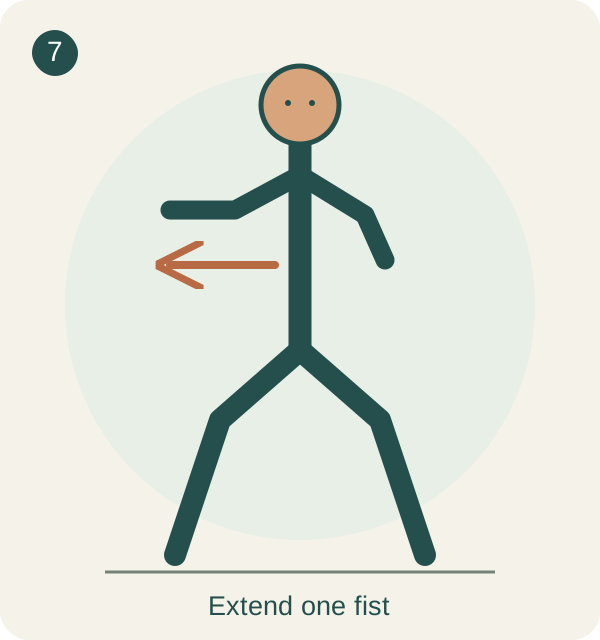
Take a comfortable wide stance with soft knees. Make loose fists and rest them near the waist, palms upward. Slowly extend the left fist forward or slightly to the side at shoulder height. As the arm reaches, rotate the fist so the palm turns downward and direct your gaze along the arm. Open the hand briefly if that feels natural, then draw it back to the waist. Repeat with the right arm. Keep the movement deliberate, as if pushing against very light resistance.
The traditional name calls for an intense gaze, but there is no need to strain the eyes or clench the jaw. Avoid snapping the elbow straight or punching quickly. You may use an upright stance and extend the arm below shoulder height if knees or shoulders are sensitive. The picture shows one fist extended; alternate arms to complete the pair.
8. Rise gently on the toes
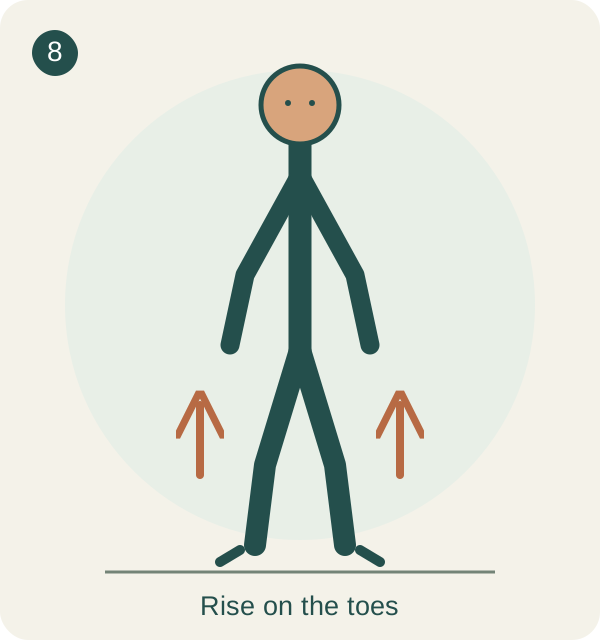
Return to a narrower, stable stance with arms by your sides. Shift weight evenly across the balls of both feet. Lift the heels a small distance from the floor, pause for a moment, and lower them quietly. Stay tall rather than leaning the torso forward. Look at a fixed point ahead. Repeat at an easy pace. The traditional sequence often uses seven rises, but fewer are fine while you learn.
Some demonstrations drop the heels sharply. A gentle lowering is a safer starting choice, especially for anyone with balance, foot, ankle, or joint concerns. Hold a counter or chair back if needed. If both heels cannot rise together comfortably, try a tiny lift or practice the weight shift without leaving the floor. The picture shows the raised position.
Finish the sequence and judge your response
Set both feet flat and let the hands float back toward the lower abdomen. Stand quietly for a few breaths. Notice whether you feel steady before walking away. The whole routine should feel like manageable movement, not a contest for deeper positions. If a movement provokes pain, skip it and ask a knowledgeable instructor or clinician about an adaptation. Stop and seek medical help for chest pain, fainting, severe shortness of breath, or new weakness.
These drawings are teaching aids, not a substitute for individual instruction. Styles differ slightly in stance width, arm path, and timing. Their shared sequence is more useful to a beginner than memorizing every small stylistic detail. Our Baduanjin blood-pressure article explains what a yearlong randomized trial measured. That trial assessed a taught practice over time, not whether each separate movement has its own medical effect. The BLESS trial (https://pubmed.ncbi.nlm.nih.gov/41706075/) found a modest difference in average 24-hour systolic blood pressure against self-directed exercise. It did not test this illustrated guide as an intervention or prove that practicing at home will reproduce its result.